Steps to install Device Control Plus Agent via DesktopCentral
Following are the steps to be followed to install DCP agent via Desktop Central:
Steps
- Open DeviceControlPlus WebConsole
- Download DCP agent from Agent -> Computers -> Download Agent.
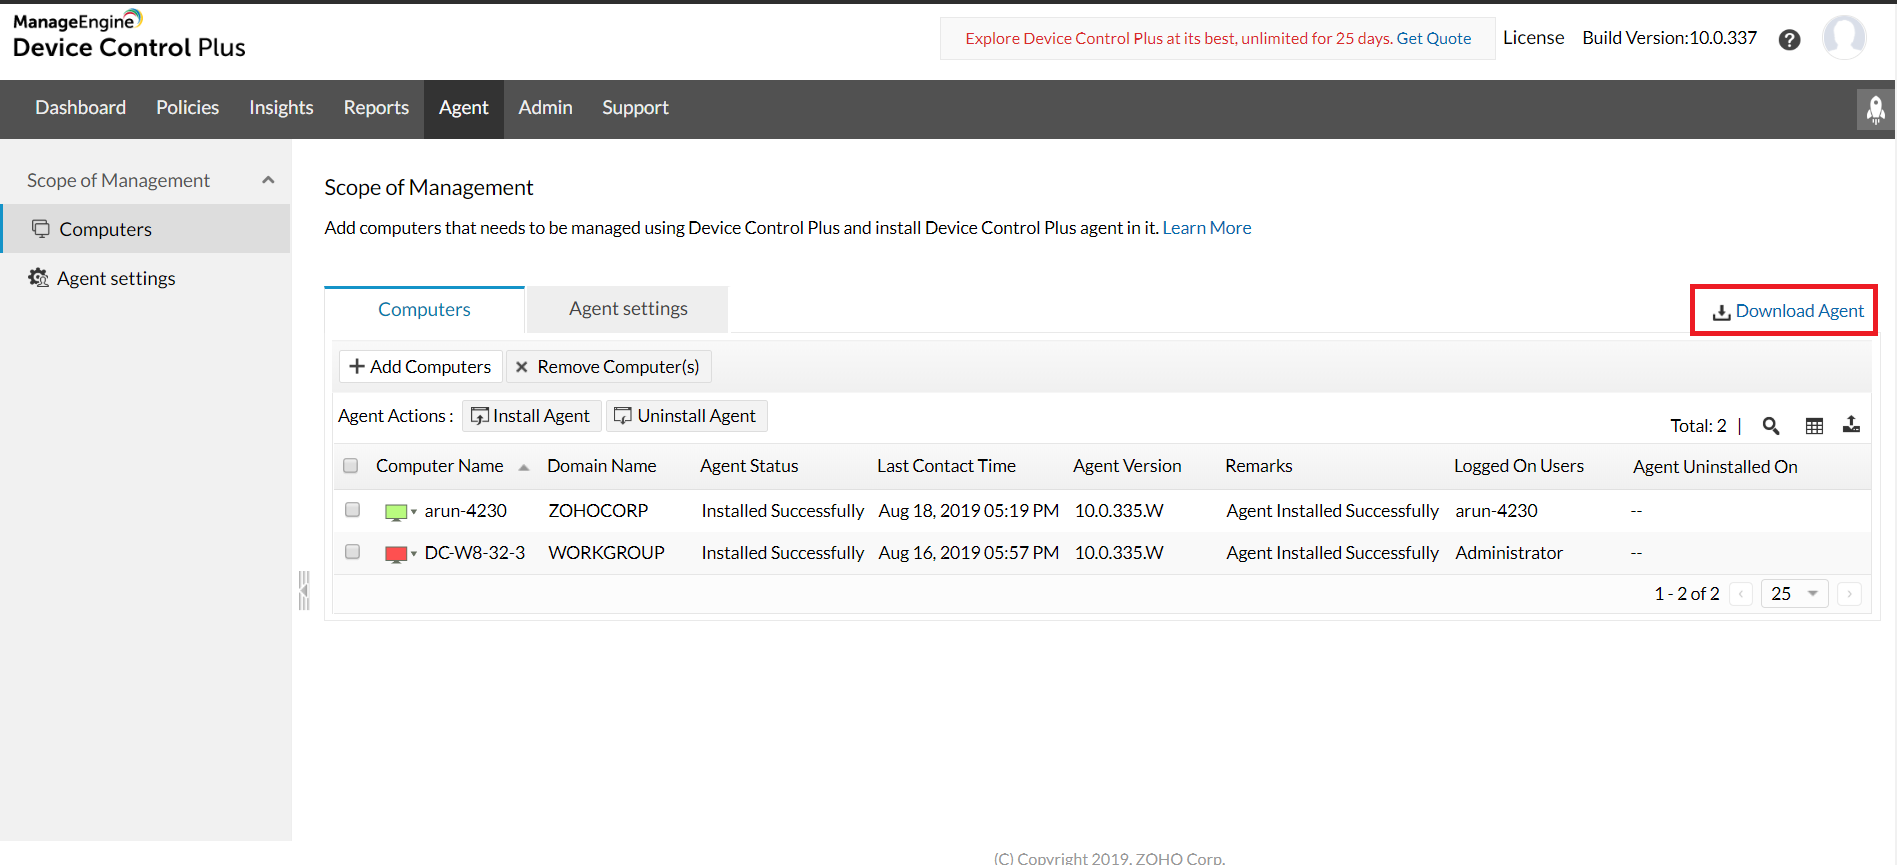
- Extract the downloaded zip.

- Open DesktopCentral Webconsole.
- Goto Software Deployment tab and click Package -> Add Package and click Windows.
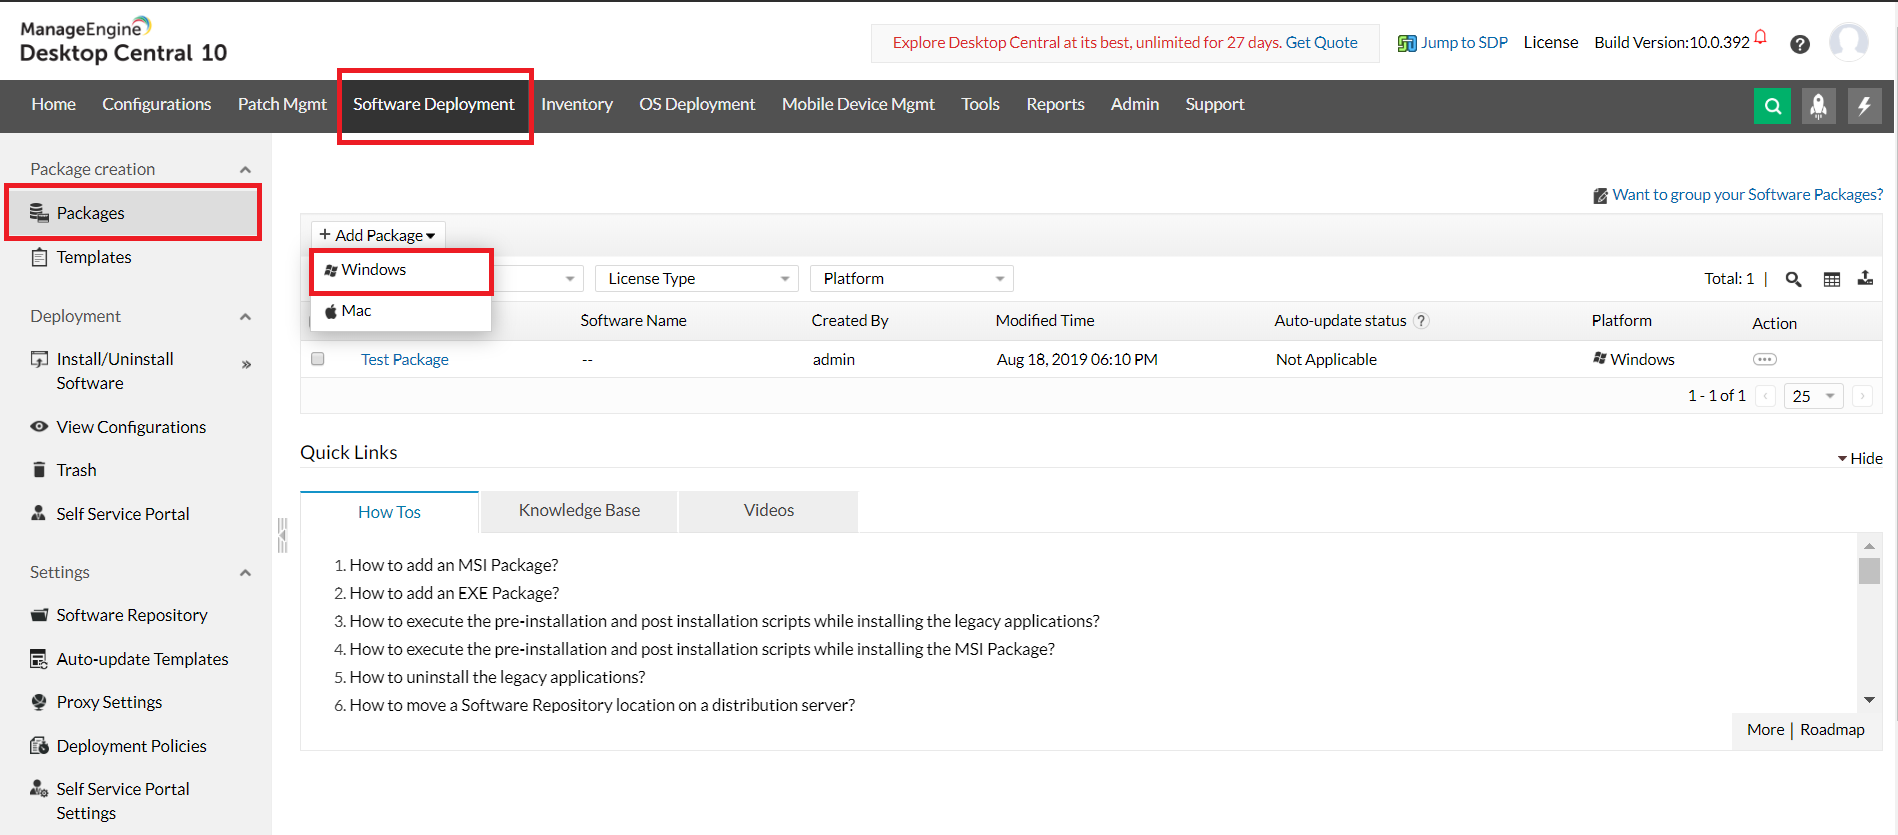
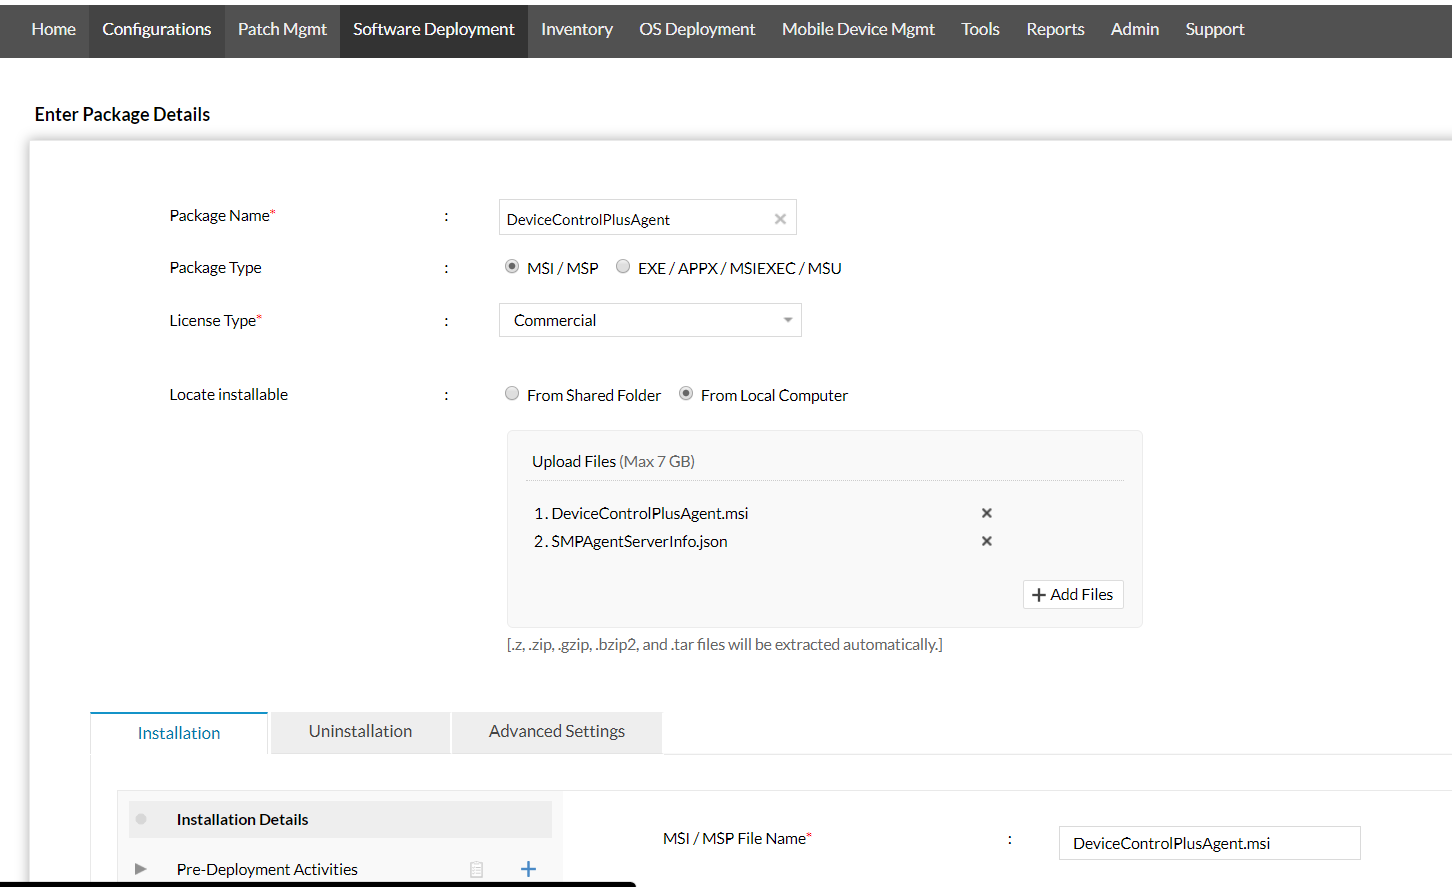
- Create package as follows:
- Set Package Name.
- Set Package Type as MSI / MSP.
- Set Locate installable as "From Local Computer"
- Add Files by clicking "Add Files" button. Choose files "DeviceControlPlusAgent.msi", "SMPAgentServerInfo.json" from Device Control downloaded agent.
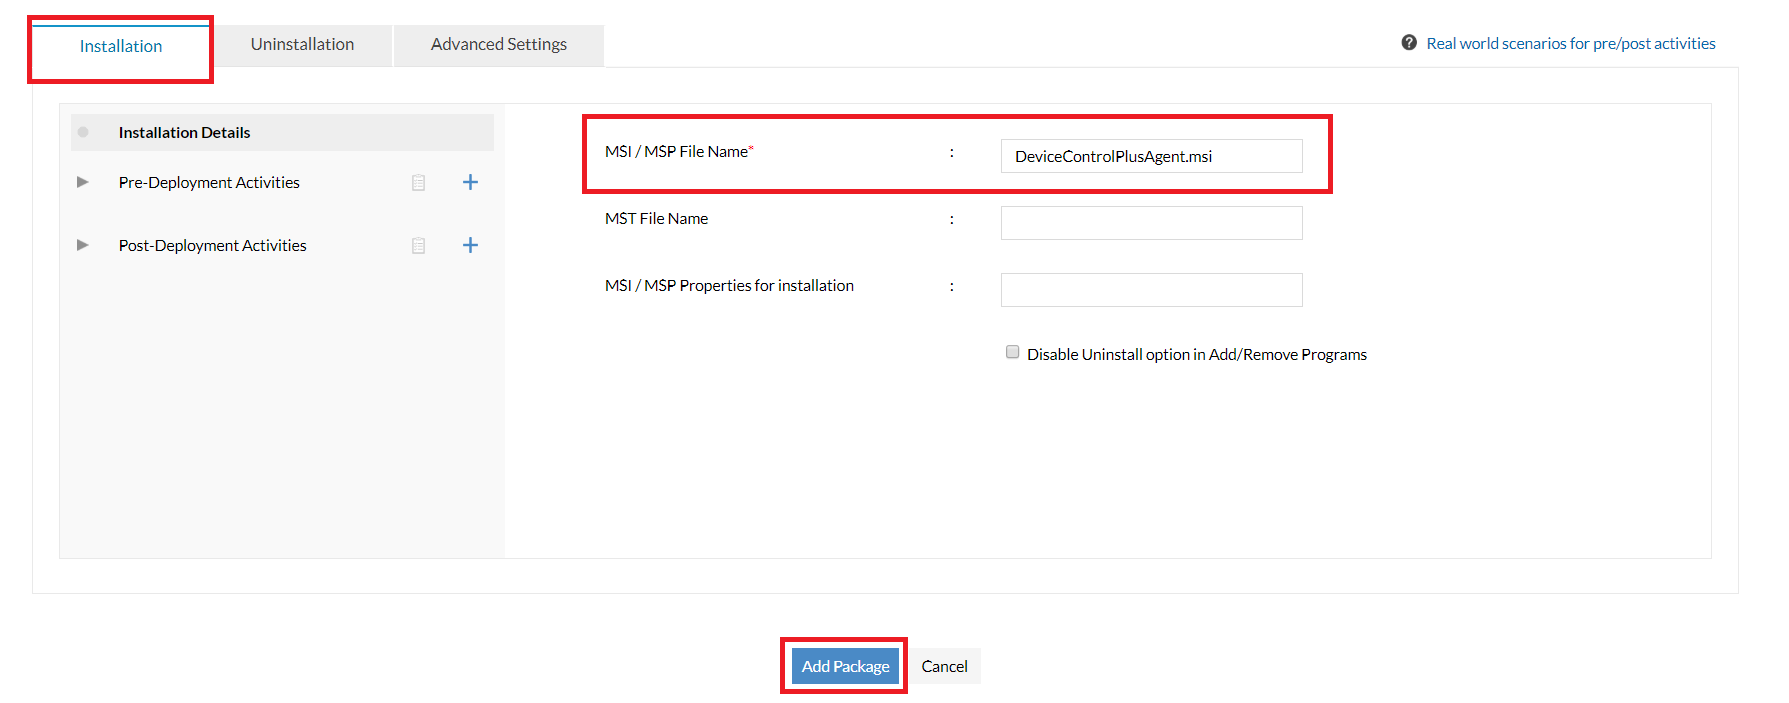
- Add MSI name in "Installation" tab and click "Add Package".
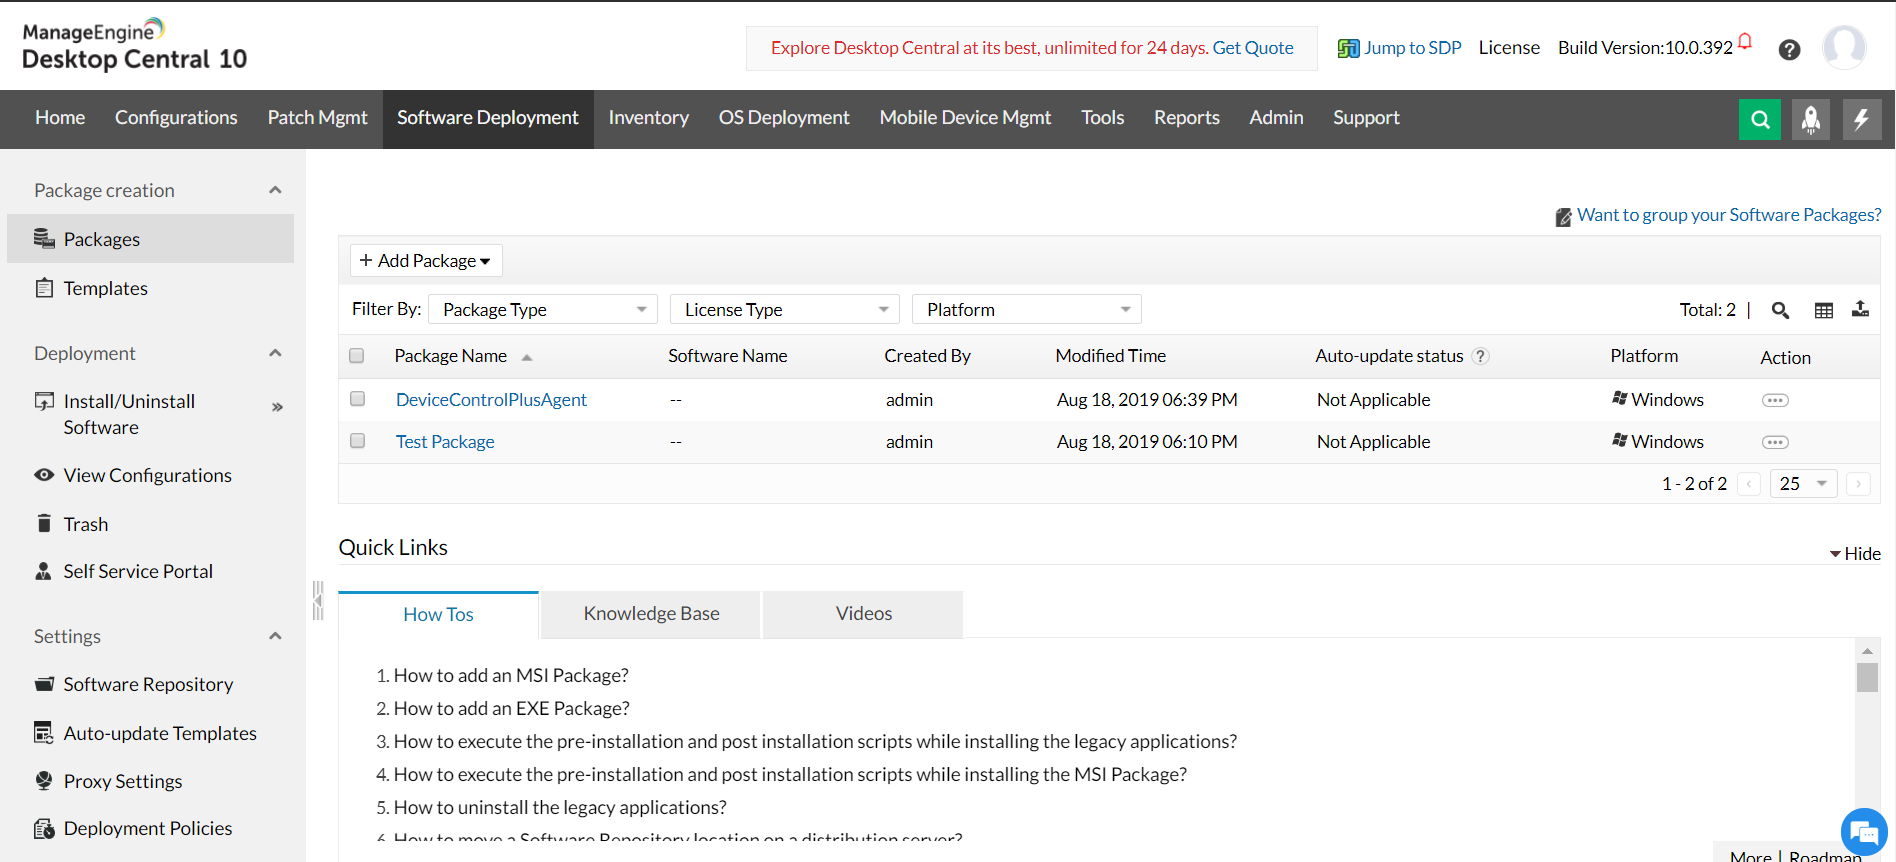
- Newly created package will be listed in the Package Table upon successful creation.
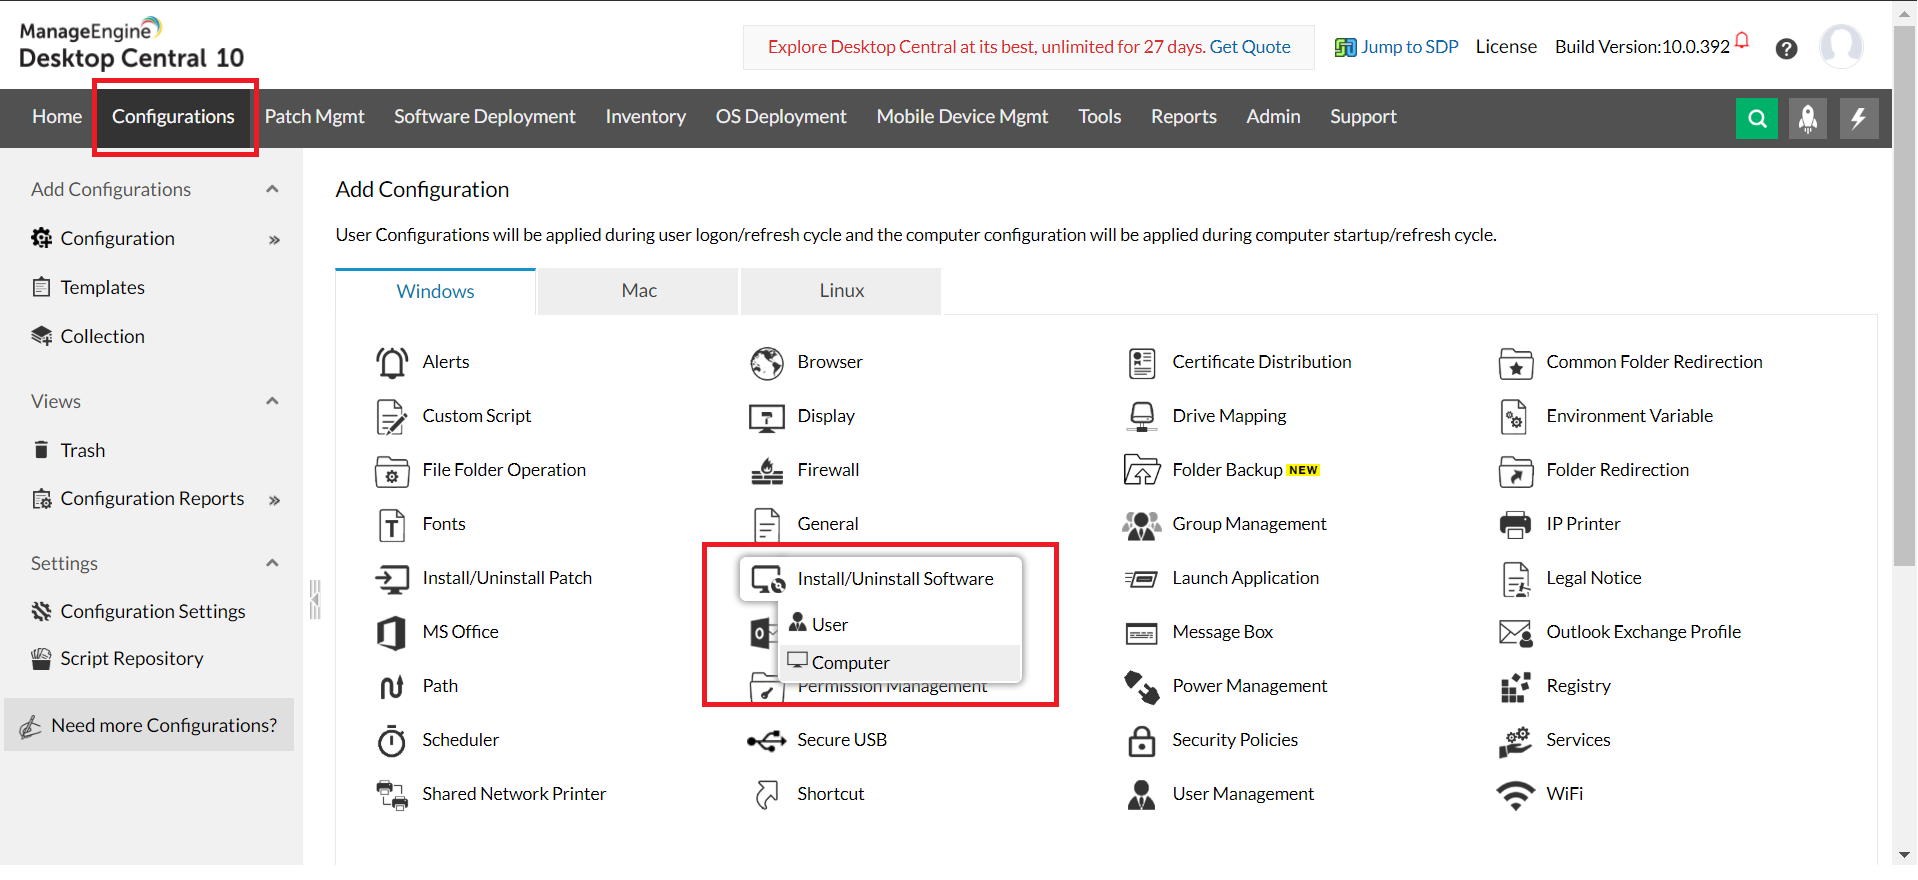
- Go to Configurations tab. Create Install/Uninstall Software - computer configuration.
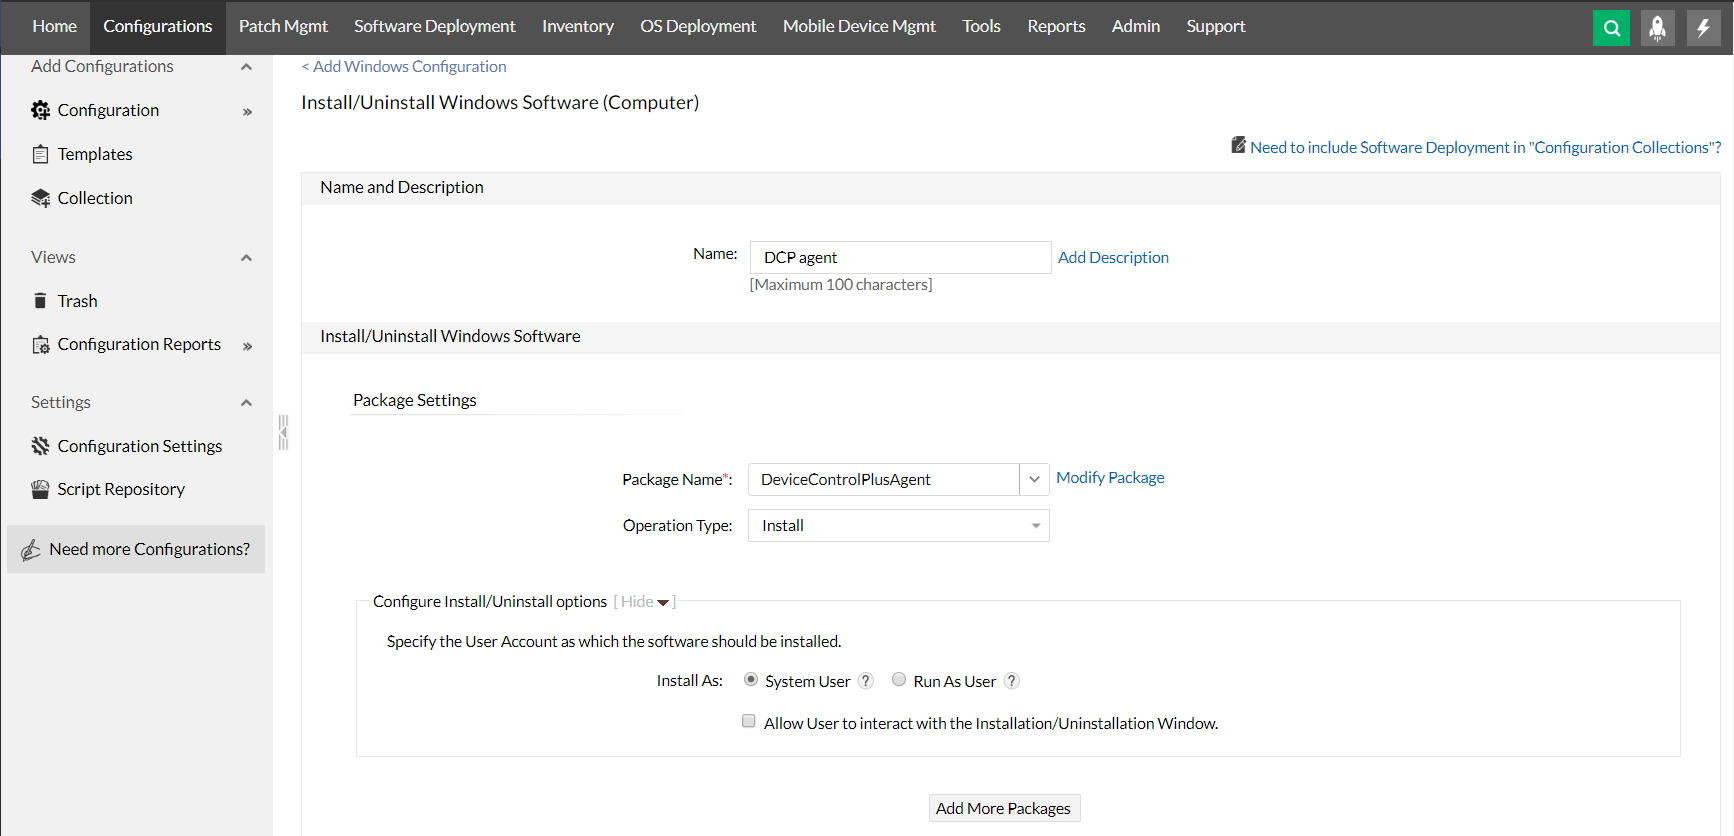
- Add Software Package in Package Settings.
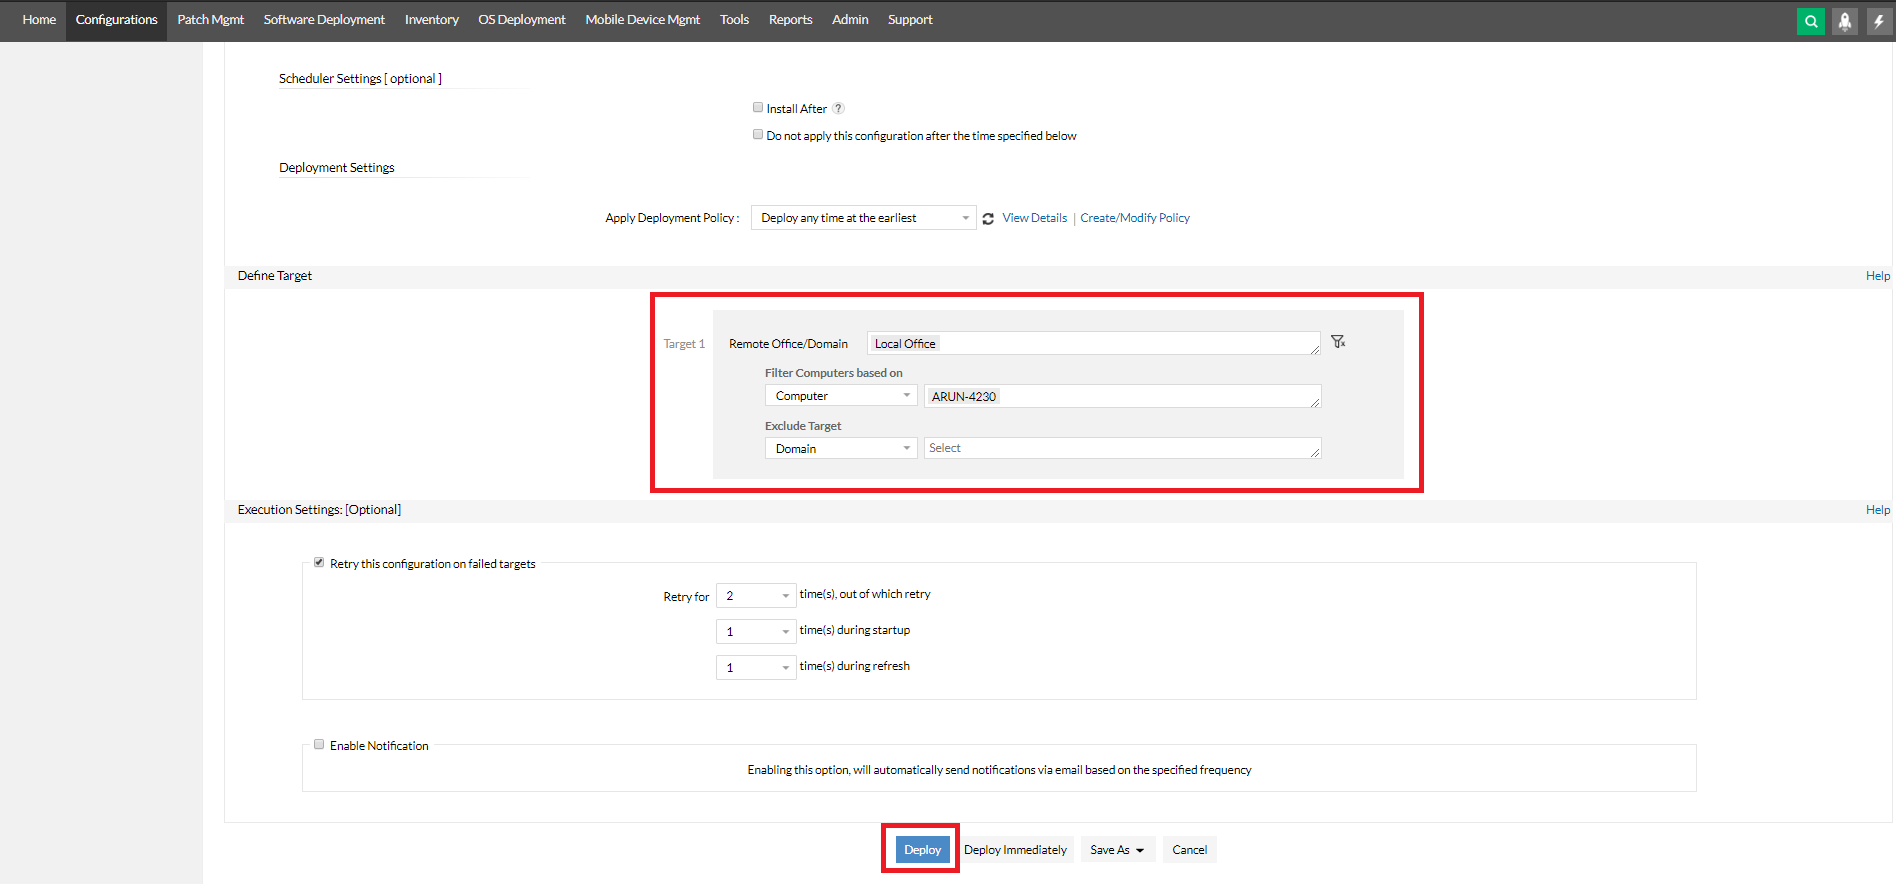
- Select the machines to install the DCP agent under "Define Target" section.
- Deploy the package by clicking either "Deploy" or "Deploy Immediately".
- Execution Status can be viewed under Configuration Summary page.


